September 25, 2024- Photography,
Take Better Pictures with your Phone – a Beginner’s Guide
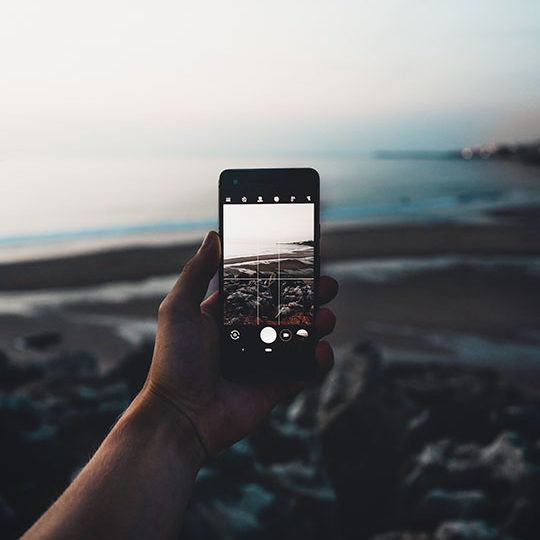
If you have a smartphone (and chances are you do), you already possess a powerful and very convenient photography tool. While high-end digital DSLR cameras are nice, they are no longer a requirement for creating beautiful photography– our phone cameras have got it covered!
Nowadays, our phones have the capability to capture high-quality images and do a lot of the technical work for us, but getting that perfect shot still mostly relies on the user correctly using the device to achieve their desired photograph. The good news is, it’s relatively easy to take great smartphone photos without needing to be an expert. You’ll just need to know a few beginner photography composition basics, and how to use your phone’s camera app settings.
Photography Basics
A great photograph is all about composition. If you want your photos to look great, then you need to consider how all the elements in the frame are positioned, and how they interact with each other to create the final image. To create a well-rounded composition, you’ll want to start with a focal point, or main subject for your photograph.
Once you’ve decided on the point of interest, consider its surroundings. Create a balance between all elements in your photograph. Balance refers to placing the elements in your frame so that they are of equal visual weight, commanding the viewer’s attention to the specific points that the photographer intended. What are the easiest approaches to achieve great composition and balance?
- Try using formal balance, also called symmetrical balance. This technique refers to putting your focal point in the center of the frame, and having the left and right sides of the image be equally weighted or directly reflecting each other, like in this photo of the inside of a church, where the pews, lights, and windows are mirroring each other. This makes for a perfectly balanced and symmetrical image.

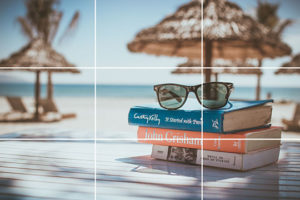
- You can also try using informal balance, or asymmetrical balance, which is when the focal point is off-centre. This technique is a level up, but is made easier when you know about the rule of thirds.Imagine there is a grid with two horizontal and two vertical lines over your frame, to create a total of 9 rectangles. The idea is to place the point of interest in your image on the intersections of the lines, or along them in order to create a well-balanced, engaging photograph. In the photo below, the books and sunglasses are the focal point, and they are placed along the right vertical line of the grid. The orange book is placed on an intersection as well, drawing the eye to the point of interest. The tiki huts in the background are also positioned along the grid lines, making for a perfectly weighted photograph.Check out some more advanced composition techniques here.
What else? Some do’s and don’ts
Now that you know the essentials of composition, your photos are already on their way to being better. But wait– there’s more! Here is a short list of easy do’s and don’ts to step up your photography game.
- Use natural lighting. For example, in the photo below, the light is coming through the window to create beautiful natural light. Don’t use your phone’s flash feature unless it’s day time. If it’s dark out, try to find an alternate light source.

- Don’t crop out your subject’s limbs/head/ears when taking a portrait shot of a person or animal.
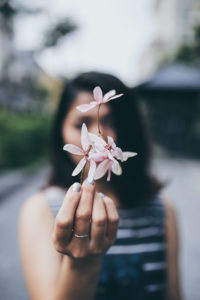
- Make use of negative space (the space around and/or in between the subject(s)) to create a stronger focal point and a more impactful photo.

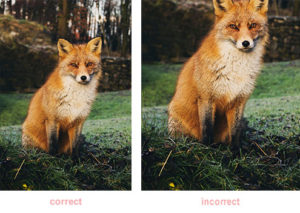
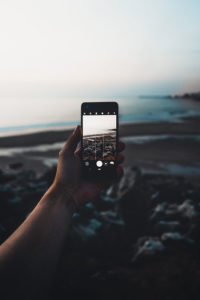
- Don’t zoom in. Doing so distorts the image by making it look either blurry or pixelated. Move closer to your subject instead, this is sure to create a stronger image. These days, it’s all in the details anyway!

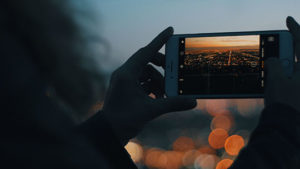
- Hold your phone with both hands instead of one to steady it. Taking photos while moving (even in the slightest) can cause blurry images, which happens more often if you are holding your phone with one hand versus two. If you have really unsteady hands, consider a mobile tripod.
- Depending on if you are sharing your photos on a social platform or not– take your photos in the orientation that is best suited for that platform. For example, the majority of photos on Facebook are displayed in landscape or square format. On instagram, most images are displayed either square or portrait. Taking your shot in the right orientation can save you some editing time later!
Using the features in your iPhone’s Camera app to your advantage
The built-in camera app on your phone has a variety of features that are really helpful in achieving beautiful photographs, especially when you don’t want to have to learn about aperture, shutter speed, and all that technical photography stuff. So, let’s get into how to adjust your settings and properly use the camera app for optimal photo taking.
- Turn on the grid to help you create better composition. Remember the rule of thirds? Well, you don’t have to imagine the grid– you can see it right in the app as you’re taking the photo! To turn it on, go to Settings>Camera> and turn on the grids toggle switch (make sure it appears green). By aligning the elements in your photograph to the grid, you can take straighter photographs with more compelling composition by using the rule of thirds.
- Use portrait mode (iPhone 7 Plus and up) for perfect depth of field. Everyone loves a good blurred background…and if you have an iPhone with portrait mode capabilities, you can create beautiful blurred backdrops (also known as shallow depth of field), using your phone! In portrait mode, you can also select the type of lighting you want to use in your portrait photograph (available only on iphone 8 and up). The choices are: Natural light, which does not change the lighting. It is the default setting. Studio light, which brightens up the subject by replicating studio lights shining on them. Contour light, which adds shadows around the subject. Stage light, which illuminates only the subject while making the background completely black, and finally, Stage light Mono, which is the same as stage light only it is in black and white.
- Set the focus and exposure. You can even lock it. To set the focus on something in your frame, simply tap the area you want the focus to be on. A yellow box will appear where you tapped, and your iPhone will automatically adjust the exposure (brightness) of the image based on your selection. However, if you want to expose a different part of the image, it can be done by pressing down on the screen for a few seconds. A slider with a little sun will appear, and you simply slide up or down to adjust the exposure. If you slide up, the exposure will be set to “high”– in other words, your photo will be bright. If you slide it to a lower exposure, your photo will be darker. Once you have that set, you can lock the settings by pressing down on the screen until a yellow button appears that reads AF/AE lock. This means auto-focus/auto-exposure. Click it to lock the settings, which is particularly useful if you are taking several shots in the same place.
- Use HDR (High Dynamic Range). Our phone cameras have a hard time exposing images perfectly when trying to capture high contrast subjects. HDR captures three images at different exposures, and then blends them together to create a perfectly exposed image. You can turn on HDR by going to Settings>Camera. Scroll to the bottom and make sure that auto or smart HDR is off. Turn on Keep Normal Photo, that way if you don’t like the HDR version, you have an original as well. Go back to your camera app and you will see the small HDR icon appear at the top. If you click it, you can set it to auto, on, or off. The only downside to this is that you’ll have doubles of every photo you take in your camera roll.
While these tips are sure to help you take photos with a better overall composition, the best way to get better at taking photos with your phone is to get out there and practice! Take lots! Adjust settings, try out different techniques, angles, subjects, and frames. The good thing about digital photography is that it’s free and unlimited!
Did these tips help you? Show us your photos in the comments!